How to purchase
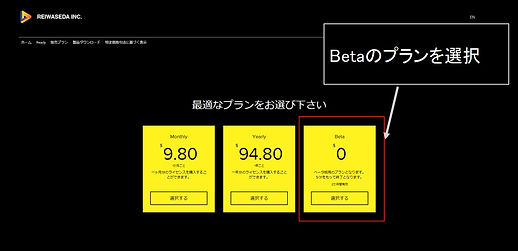
1. First, go to the sales plan page on this website.

2. Select the "Beta" plan.

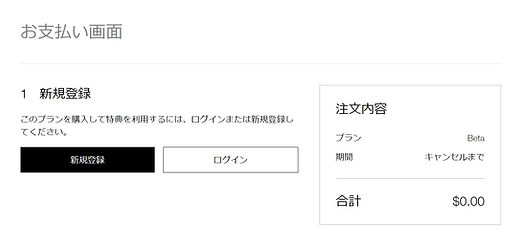
3. If you have an account, please log in. If not, please register.

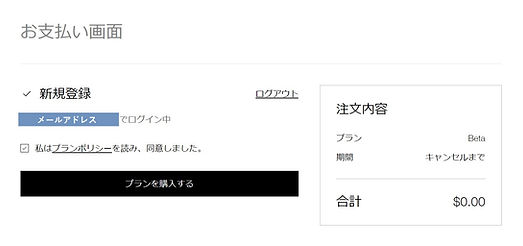
4. After completing the registration, agree to the plan policy and purchase the plan.

5. If the screen below appears, your purchase is complete!
If you want to install it as it is, download it from "To product download".

6. Below is the download method.
Select "Jet Cut Ready for Mac".

7. Make sure it's "Jet Cut Ready for Mac" and add it to your cart.
"for Mac"
sure to be!

12. Extract the downloaded zip file to any location.
13. After extracting, if you can see a folder called "JetCutReadybeta-win.zxp", you're done!
How to install
①
②
1. The following two software are required to use this product.

We will omit the introduction of this software.
Please prepare by yourself.

This software is required to install plug-ins to Adobe products.
In other words, it is used here to introduce "Jet Cut Ready" to "premire pro".
Below, we will explain how to download this software and how to install "Jet Cut Ready" to premire pro using this software.
Please bring your own
2. First search for "zxp installer" and select the page as shown below.

3. Click Download Mac OS X to download the ZXP/UXP Installer.

4. Double-click the downloaded exe file to start it, check the checkbox and click "Install".

5. When the following screen appears, installation of "ZXP/UXP Installer" is complete!
From here, use this "ZXP/UXP Installer" to introduce "Jet Cut Ready" to premire pro.

6. Drag and drop the folder "JetCutReadybeta-win.zxp", which was expanded and confirmed in "12" of the purchase method, to this screen.

7. Select Install.

8. Select Close.

9. If you see the screen below, you're done!
Now let's move on to premire pro.

10. On premire pro, select “Window” → “Extensions” → “JetCut-Ready–beta-”.

11. Enter the email address you used to make the purchase and click "sign In".

12. Select an appropriate clip and press the start processing button, and an error like the one on the right will appear, so press "Cancel".


13. Go to "Settings → Security & Privacy → General" and select "Allow anyway" for ffprobe.

14. Select the appropriate clip again and press the start process button, the error shown on the right will appear, so press "Open".


15. Select cancel because the following error appears.

16. Go to "Settings → Security and Privacy → General" and select "Allow anyway" for ffmpeg.

17. Finally, select an appropriate clip again and press the start process button, and an error like the one on the right will appear, so press "Open".


18. Installation is now complete!
Thank you for your hard work!
how to use
1. Select one clip you want to cut and click the Start Processing button.

①
②
2. Explanation of various buttons

That's all for the explanation!
We hope you find this product useful!
